Minecraft Mission to Mars

Minecraft Mission to Mars


I’m so excited!  I literally bounced into one of my co-teacher’s rooms after school last week, waving around my computer and shouting, “Look at this!  Sooo cool!  The kids are going to FREAK!” I’ve only been at this school for two terms, but my new School Squad know me well enough to smile indulgently when I show this much enthusiasm.

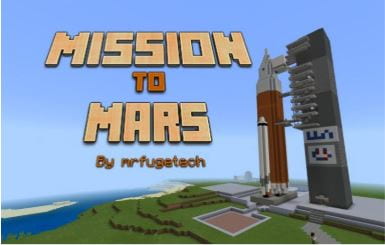
I’d been looking for a fun, challenging and engaging collaborative Minecraft challenge that would stretch my students and be a good feature for our STEM week event.  I found it!  It’s available on the Minecraft Education Edition website and is called Mission to Mars, created by the talented Chris Fuge (Twitter,  website) (I hope you create more worlds and lessons soon!)  It looked awesome.  Students tour a NASA facility, learning how to survive and thrive on Mars, with lots of NPC scientists providing external links to more kid-friendly research.  Then, and this is where it gets AWESOME, you fill a single, solitary chest with just 27 items before blasting off in a rocket ship to Mars.  There, you have to build a colony, survive radiation, accidents and sickness, find water, create a facility and grow enough food to survive.

My School Squad are fantastic, but they are yet to become Minecraft enthusiasts (I’m already straining their brains with Seesaw!)  So, there was only one thing to do. I had to call in the big guns to help me to experiment with this world – my two personal children (as opposed to my many school children!)

So began a wonderful afternoon of research, debating, arguing, crossing out and filling in of lists before we launched off to Mars and built our colony.  My 12 year old son is the true building whizz, with my daughter having a flair for organisation, and I’m pretty good at planting trees and harvesting wheat. (I’m far better at teaching with Minecraft than I am at using Minecraft, but I get by).  We were all pretty happy with the results, and I was able to get a lot of tips to pass on to my less experienced students.

Here are our top tips for successful Mars colonisation:

  • Teamwork – definitely have groups of at least 3 students, stretching to 5 quite comfortably.
  • Research which tree types grow best in an enclosed area, and how far apart to plant them.
  • Crops need water to grow – have a couple of plans for how to get water on Mars.
  • Have students assign roles – this is more efficient than everyone going off and doing their own thing.
  • Eat regularly – all of that building and exploring will make your hunger grow quickly.

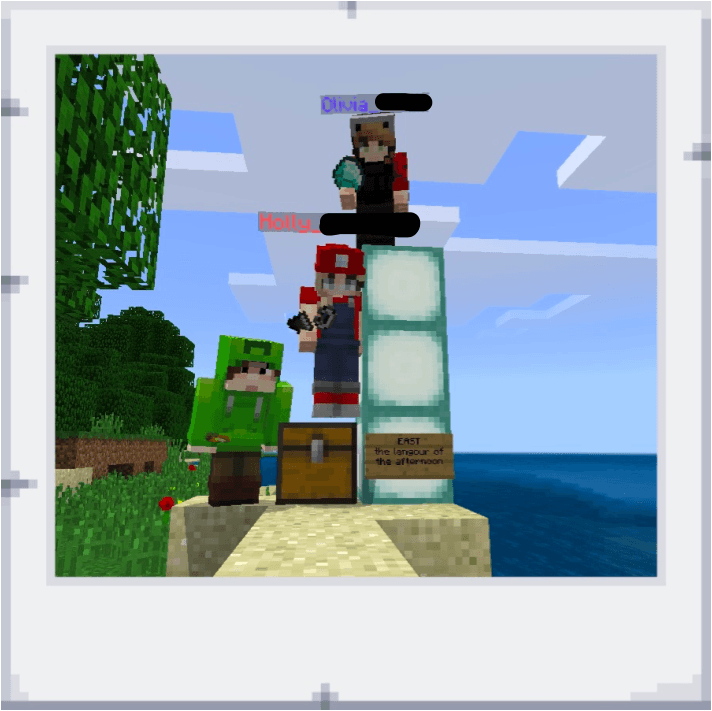
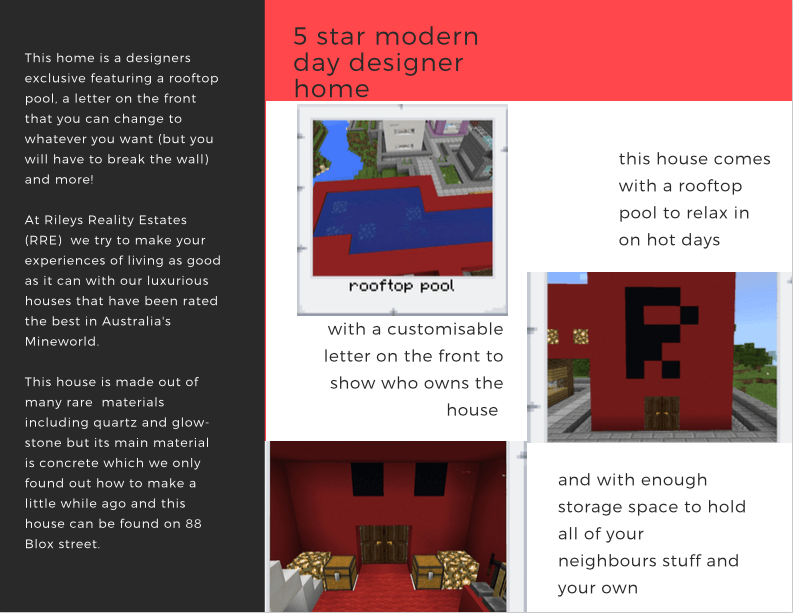
Here are a few screenshots of our colony.

This module arrives with you on Mars – we added multiple furnaces to speed up glass production.
Crops need water – how will you ensure you have enough?
We put animals and trees into the same greenhouse. Our trees are planted too close together – some didn’t grow.
Our partially built colony. Mars is desolate and lacking in many resources. Pack carefully!

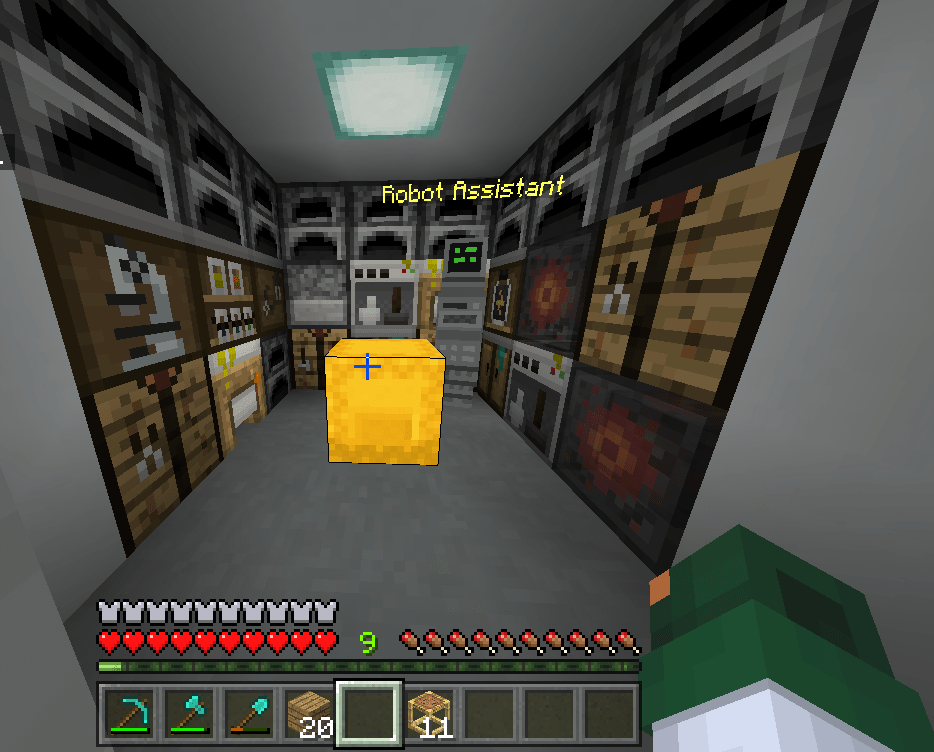
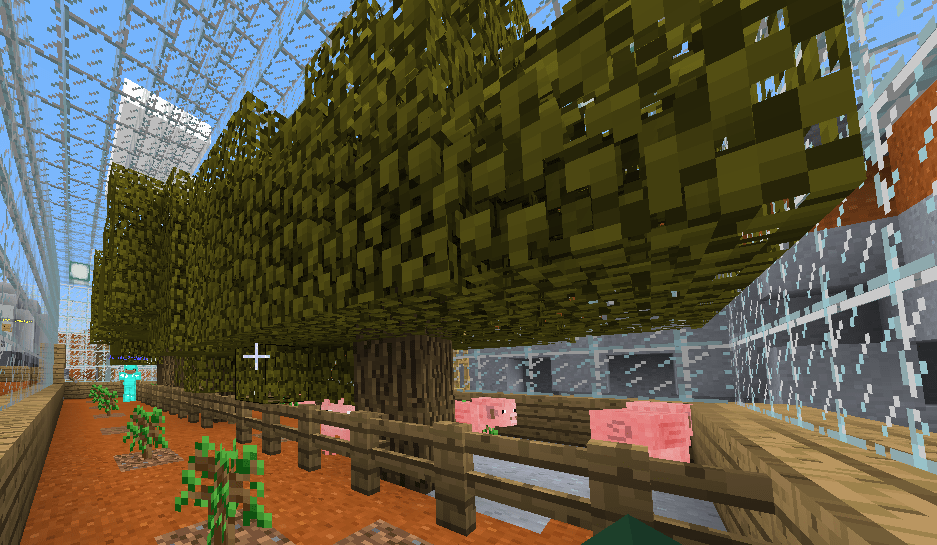
Our conclusion?  This activity is as awesome as it looked on the website!  Seriously, I can’t wait until I get back from the July holidays (two weeks in winter in Australia) and get stuck into my Minecraft sessions.  I’ll have six weeks of 110 minutes with my group of 25 students, which should be just about perfect.

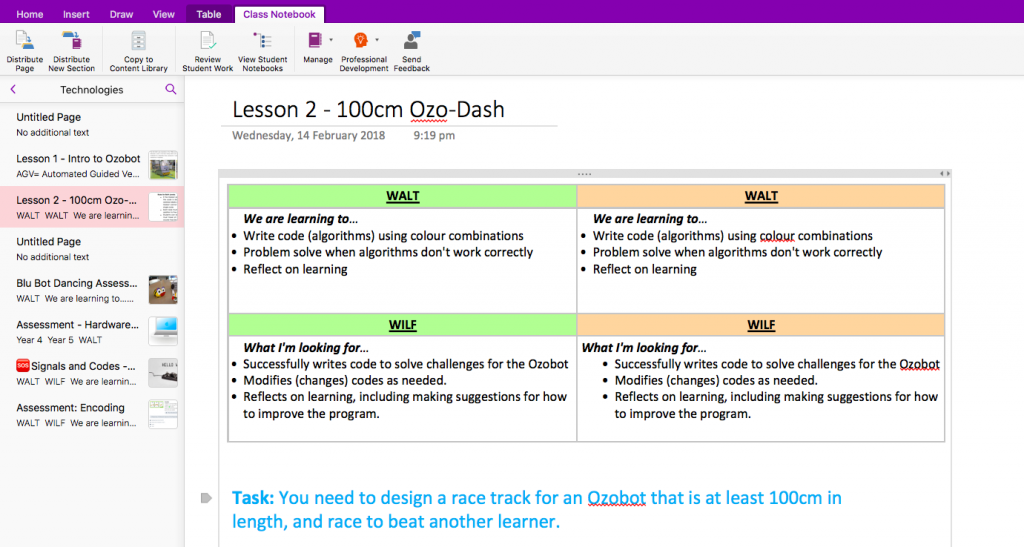
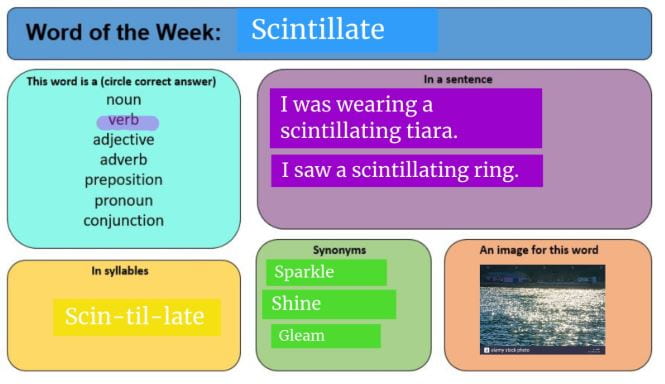
I’ve adapted the already fantastic student worksheet provided (the original was designed for printing – I’ve adapted it for OneNote use). You can find the OneNote version here along with my other resources created to go with previous blog posts.  Full credit to Chris Fuge  – I’ve just added in my trademark tables and a place to insert photos.  I’ll also have students document the entire journey by using the Minecraft Portfolio and Camera objects (meaning my students get to select only 25 objects!)

Want to know what our final Mission to Mars pack list was?  Sorry – not telling!  You’ll have to download the world from the Minecraft Education and try it out yourself.

Creating Seesaw Activity Templates

Creating Seesaw Activity Templates

Get the Seesaw Activity featured in this post here.  Discover, use and adapt new Activities as I share them here.

I’ve been a Seesaw user for years.  It’s always been a great communication tool, but since the introduction of Seesaw Activities, my uses for Seesaw have exploded. It’s my favourite exit ticket.  All I have to do is to create an Activity, put the screen showing all of the student names on the interactive whiteboard, and refresh every couple of minutes.  Then, it’s just a matter of asking, “Johnny, where’s your post please?”  When they know that they don’t go out to recess until it is done – it happens!

Seesaw Activities haven’t really been used at my school until now.  Several of my colleagues are now using Activities that I’ve created, or that can be found in the Seesaw Library (one of my favourite additions to Seesaw ever!)  Every week, we have a whole-school Word of the Week.  This same word is introduced across Reception (That’s South Australian for ‘kinder’ or ‘prep’ or whatever you want to call the first year of school) to Year 12 (senior year). How we expose the students in our own class to the Word of the Week is up to us, and we modify it to suit the year level.

I’m going to tell you a secret here – I haven’t been very good at remembering to do the Word of the Week every week. I’m new to this school you see, and I’m new to working in the public sector after working in Catholic Education for 15 years. So, there’s been a lot of things to get used to, and I haven’t been able to do everything all at once.  But, it’s been almost two terms now, and I’m feeling more settled – so I felt that it was time for Word of the Week to make a new, improved reappearance.

I decided that introducing it in Homegroup would suit my Year 5/6s. They’re in the habit of coming in each morning and pulling out their computers to check emails, find new assigned Seesaw activities and do Mathletics.  Every Tuesday morning is now Word of the Week morning.  For the next term, my students will be investigating the relevant Word of the Week, and writing about it on this Seesaw Activity template – created by me!

How did I create this template? How long did it take me to create this template?  Well, that’s pretty easy really.  I created it in PowerPoint, and it took me approximately five minutes.  PowerPoint is my favourite tool for creating items such as this, because I don’t have to worry about any pesky picture/ shape formatting that is problematic in something such as Word or Google Docs.  I inserted a rounded rectangle by using Insert – Shapes- Rounded Rectangle.  Insert – Text Box gives me the text (using the text box built into the shape puts the text into the middle of the rectangle – something I didn’t want in this case). All I did then was to copy and paste, rearrange the size a little, edit the text and change colours because it makes me smile.

To make it into Activity Template form, I took a screenshot using the Snipping Tool feature of my computer, and saved as a .jpg.

What I like about this particular Activity is that it uses the brand new upgraded features of Seesaw.  It is so awesome to have extra tools such as a highlighter to use – and the ability to insert photos has just about changed my students’ lives.  I kid you not – they were so excited!

Is it just me – or did this student go above and beyond by making her text labels the same colours as my rounded rectangles?  Sometimes in life, it’s the little things!

I’m just getting started with sharing Seesaw Activities with the Seesaw library. I was pretty chuffed when this activity was featured this week in the weekly Seesaw Activity email.  It’s nice to know that other teachers are benefitting from my work, just as I benefit from theirs. My motto in teaching – work smarter not harder!


Minecraft Lunch Club!

Minecraft Lunch Club!

This blog post is co-written with the lovely Heather Docherty – my main partner in crime (I mean, inspirational work colleague!) You can follow her on Twitter here:
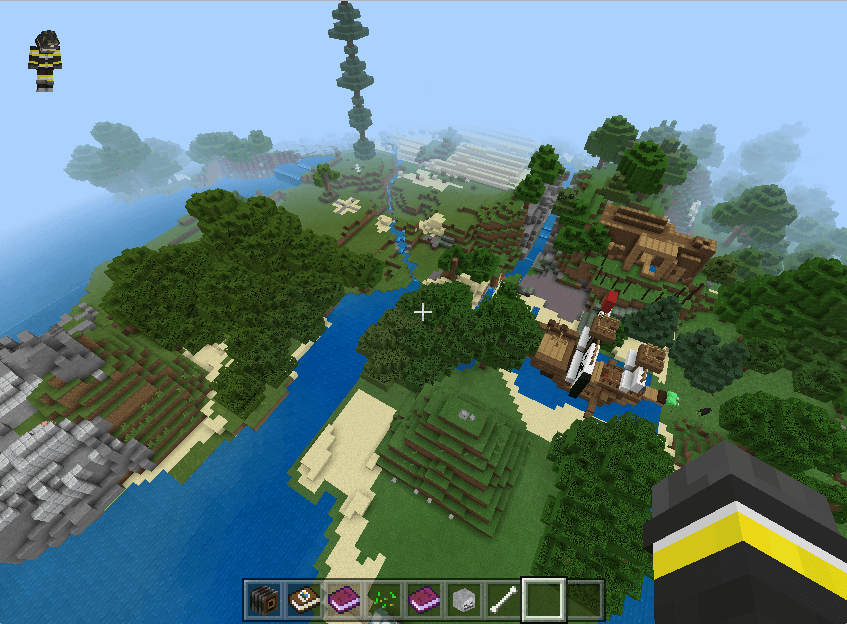
 @hdocherty215  and while we’re at it, my Twitter handle here: @teacherbau


For the past few weeks, we have been volunteering our time to run a playtime Minecraft Club for 20 learners from Years 3, 4 and 5.  Learners were put into teams consisting of two Year 5s, one Year 4 and one Year 3.  

Over the course of the five weeks, the teams worked together to complete challenges in a world that was created based on the book Treasure Island by Robert Louis Stevenson.  It’s a brilliant world, you can find it on the Minecraft Education Edition website here.

The challenges that learners participated in were: 

  • Compass Challenge 
  • Scavenger Hunt 
  • Treasure Map 

In Compass Challenge, learners had to navigate around the Island and discover beacons placed at the eight main compass directions. To prove that they worked as a team, they had to take a team photo at each location, and send the photos to the two of us.  This was challenging because learners were tempted to fly off in all directions, and then had to negotiate where to go first, how to gather as a group for the photo, and how to keep track of which beacons had not yet been located. 

During Scavenger Hunt, learners worked in their same teams to find all of the items listed in a Minecraft Notebook. They were able to split up for this challenge, as time was limited. This challenge required constant communication and co-ordination as learners had to determine which items had been found, and ensure that photos of each finding were taken to record the location of the objects as evidence.  There was a great deal of confusion and then laughter as learners tried to complete the item, ‘tame a parrot’. 

Finally, learners were presented with the most complicated challenge yet – Treasure Map.  The Island they were working in is based on the original drawing from the book Treasure Island, with treasure hidden at the three locations marked with an ‘X’ on the original map. Learners had to work together to interpret the map on the Smartboard and compare it to the map on their computers within Minecraft. This required learners to use their understanding of map reading, including rotating, zooming and closely observing details.  Working within a limited timeframe meant that learners had to collaborate, with some taking on the role of map reader, team coordinator, treasure digger and photographer. 

Logistics

To enable the Minecraft Club to be a success, we created excitement amongst the students by informing them during the day that the Club would be on offer.  We then held a ‘find out more’ session during a lunch time.  We showed them the world, and explained how the Club would work.  We then took down the names of learners that were interested (some decided it wasn’t for them – they had been hoping for free play).  Happy to say, we had far too many interested learners!  So, we drew names then and there out of a hat, and created the first cohort. We sent home permission letters, outlining that it was a commitment, and it would be taking place during a playtime.  We also explained that continued participation hinged on learners following the school’s established ICT agreement.  We had 100% take-up, and our learners eagerly attended every session.

Outcome

We have been very proud of the collaboration between learners, with more experienced players providing guidance and support for newer participants. Seeing learners from a mix of year levels engaged together in problem solving, negotiation and fun has been well worth giving up some break time!  We had a new contingent of learners begin the Club this week, and we’ll be hunting through the Minecraft for Education World Library for another suitable world for later next term.

Conclusion

Give it a go!  It was fantastic that we had each other – that meant we could still take it in turns to duck out and have a snack etc.  So, while you could run a club by yourself, everything is better with friends, so we recommend that you rope in a colleague. You don’t have to have a lot of personal knowledge of or ability in Minecraft, just read the notes attached to the world.  An open mind and adventurous spirit will get you through!


Bump It Up!

Bump It Up!

Our Lady of Grace is taking part in Visible Learning Plus Training through Corwin.  It’s a three year project, and we’re only in the first year, but I’m already finding that the training is having an impact on how I teach learners.  I already use Learning Intentions for all of my units and lessons, and these Learning Intentions – in the form of WALT (We Are Learning To) and WILF (What I’m Looking For) are on display both in the classroom, and in my Class OneNote.


I also use rubrics in all assessment pieces – so learners can read exactly how to get a good grade.  I explicitly teach how to read and use rubrics, and the checkboxes in OneNote mean that the learners actually self assess as they go – ticking the boxes based on where they believe they sit.  I check all of the boxes in the ‘Not Yet’ section, and they move them up as they go along.

But, it was during one of the early Visible Learning Plus training days that I had an ‘ah-ha’ moment.  Gilbert (our trainer – Twitter account here) mentioned ‘Bump It Up’ walls – particularly for Junior Primary students, who can’t necessarily read and understand rubrics yet.  But, many of my learners are visual learners – how powerful would a Bump It Up wall combined with a rubric be?!?!

Even better, how powerful would it be if the learners and I created the Bump It Up wall together?!?!  (Mind blown!)

For the TimeLine Bump It Up, I began with a timeline about The First Fleet that I found on TeachStarter. (I have a membership).

I copied the timeline onto a PowerPoint document, and added ‘Above Standard’ to one page, with a duplicate slide titled ‘At Standard’ on a second page.  The third page I left blank, apart form the words ‘Below Standard’ placed in the top corner.  I then printed multiple copies in A3 size, and the learners and I got to work.

First, they were divided into groups, and asked to identify all of the things that made the Above Standard Timeline above standard.  They were then asked to CHANGE the timeline on the second page to make it only At Standard.  Finally, I asked them to create a Below Standard Timeline.

I’ve never heard so much giggling from a class of Year 5s in my life!  They thoroughly enjoyed creating a below standard timeline, and fell over each other to create the worst possible piece of work!

Once they’d regained their composure, I gathered them together, and we collated their thoughts onto my original PowerPoint.  I demonstrated how to use the simple tools of PowerPoint to add text and arrows to the page.  Then, the students went back to their groups, took a photo of their Below Standard timelines and added text and photos, before sending the pages to me.  Here are some of them below.

I don’t believe in reinventing the wheel, so a quick internet search turned up the cutest free signage here. Then, up it went onto the wall!  When students were creating their timelines, they literally got up, crossed the room, and compared their timelines to the Bump It Up wall.  One student looked at the wall, looked at me, shook her head, and said,

“I can’t believe I forgot to put in a title!”

before walking away to fix the situation.  Heart filled!

Of course, I can’t have all subject areas up at the same time – I don’t have enough wall space!  So, I did what I always do, and had OneNote come to the rescue.  I created a new Section, called it ‘Bump It Up’ in the Content Library of the Class OneNote, and now I add the examples as we create them.  That’s been really useful, because not only will I have them in a central location for next year, but the learners can go back and refer to them as they need to.  This is particularly useful for items such as timelines and graphs, which are integrated across various areas of the curriculum.

It did take most of a lesson to create the Bump It Up wall WITH the learners, so it’s not something that I can do all of the time.  However, I think that it’s worthwhile doing it like that whenever I can, because it’s so much more powerful when learners are involved in the process, not just left with the outcome.

I also ran a shortened version of the Timeline activity with the School Board, so that they could really understand how the Bump It Up idea works.  They took it so seriously, and got rather competitive about the whole process!  They said that they enjoyed the experience, and it added to their understanding.  I think that in future though, I’d better bring a prize for the team that finds the most relevant points – they were disappointed that I didn’t have one!


Real Estate in Minecraft

Real Estate in Minecraft

Ok, so the first lesson we did made sure that all Learners had the same basic skills to navigate and create in Minecraft.

This lesson in Minecraft Education Edition was all about helping learners and their families realise the educational potential of Minecraft. The lesson was based in Starter Town – a lovely little world with some basic civics buildings and 30 numbered empty blocks of land – just waiting for eager builders!

Students negotiated amongst themselves on land selection, and were given two lessons to build, fit out and photograph their property.  (They won’t always need that long, but many of the students are still adjusting to the controls on Macbooks). The whole lesson was outlined in OneNote to ensure that learners stayed on track.  I’ve shared the overall lesson plan here (just look for the page called ‘Starter Town – Real Estate’.) . The Learning Intentions are shown in the image below.

Learners created such diverse houses – from castles to mansions, to mushroom cottages, to log cabins to glass houses.  Infinity pools, cinemas, fireplaces, libraries – all included.

This is where it got educational – learners had to create a sales pitch for their property, based on real estate adverts, then create and publish a tri-fold brochure.  We used the website Canva, which has a brilliant range of easy to use templates.  Just make sure that students don’t accidentally include any paid features – they can’t download their work if they do.. The completed products were very impressive, and I discovered creative flair that I hadn’t suspected lived within some of the students.  Below is one of my Learner’s brochures.  I love his use of colours, photos of unique features and range of adjectives used.

Brochures were printed double sided, and then trimmed, folded and sent home – with strict instructions to share immediately with parents. The verbal feedback that I received from parents was very positive – their children were coming home excited about their day, babbling about Minecraft, and excitedly thrusting brochures under their noses.  Students that were usually reluctant writers were incredibly keen to explain the features of their property, and to justify the hefty price tags attached!  Everyone could instantly see the educational value of Minecraft – in this instance, it was used as a prompt to inspire literacy.

A win-win-win situation if ever I saw one – happy learners, happy parents, happy me!  Next lesson will be looking at the Civics buildings that are in Starter Town.  I can’t wait!

Class Compliments

Class Compliments

I’ll admit it – I was having a grouchy kind of morning.  You know, the kind where you haven’t slept properly, where there was no milk for your tea, rain was threatening – nothing Earth shattering – just a little black cloud over my head.

I had a Keeping Them Safe – Child Protection lesson planned. Part of the lesson involved writing down nice things about your classmates.

I’d come across the perfect little activity on Seesaw.  It’s called Classmate Compliments. Simple really – children open up Seesaw, take a selfie (with a fair amount of background room), then leave their computers open, and move around the room, writing down something nice on ten different computers.

I gave some pretty clear instructions…

  • You don’t have to be friends with everyone, but you do have to be friendly with everyone – kind words only.
  • Challenge yourself – don’t write on your best friend’s picture – you tell them how awesome they are all the time – pick people outside of your close friends.
  • Mix it up – boys, girls, different year level to you.
  • Don’t just write about looks – you’ve been in a Village with these people for at least six months – go deeper.

There was a buzz and excitement in the room that is usually reserved for Minecraft lessons. My slightly-sarcastic, little-bit-jaded, too-cool-for-school Year 4s and 5s forgot to pretend to be blasé, and got right into it. I overheard some of the kids saying, “This is fun!  I like this!” At the end of the session, they all excitedly went back to their computers.  They mouthed the words to themselves at first, then the tentative smiles turned into grins, and the grins into excited shouts.  “People think I’m smart?”  “You really are funny!”  “Someone said I’m inclusive, and that I’m a good friend!”  My little black cloud began to lighten – and I found myself smiling.

“Who’s feeling a little bit special right now?”  I asked. Every hand went up. They were all grinning from ear to ear.

In demonstrating, I had taken a selfie, and left my computer open too.  You’ll have to excuse the photo – remember, I hadn’t slept well, had almost no make-up on, and the overcast morning came with a healthy dose of bad-hair-day wind.  But, the results, well, they speak for themselves!

My little black cloud evaporated instantly, and I had to read the words through happy tears. I looked up to find everyone smiling at me. “You have the most words Sarah!” “Yeah, everyone was lining up to write on your photo.”

I looked at my kids and smiled, “I really do love you guys.”

PS – My son is one of my students – hence the ‘Great Mum’ comment!

PPS – I’m pretty good at flossing – the kids taught me on school camp!

Beginning with Minecraft Education Edition

Beginning with Minecraft Education Edition

Feeling overwhelmed at the mere thought of trying to use Minecraft Education Edition with your students?  I’m guessing that this is because your students know so much more about how to play it than you do?  Never fear – just strap on a growth mindset, be prepared to learn from your students, and dive straight in!

Minecraft Education Edition is a new adventure for me.  I’m currently heading up a team at my school where we are taking part in a Catholic Ed SA project for using Minecraft Education Edition through a religious lens, with the aim of teaching sustainability. But, before we could get to a religious perspective, we had to up the Minecraft skills of our students, and get them used to the idea that this was learning, not just play!

Needless to say, they were beside themselves with excitement.  I’ve been teaching the same group of learners for a couple of years now, and they have an excellent growth mindset (particularly when it comes to digitech!) and love to be my guinea pigs.  To begin with, we got all students participating in the project (all Year 3, 4 and 5 learners – around 100 students) together and we established our agreed practices.  The teaching team felt that this was important, to separate learning from playing, right from the beginning.  Here is a copy of what we came up with.

The agreed practices has been invaluable – there has been absolutely no confusion about which worlds students need to reserve for learning, and which ones they can use during inside play (for example due to bad weather).

Side note: the Big 5 is a school-wide code of conduct, and consists of:

  • Be Christlike
  • Be Brave
  • Be Supportive
  • Be Respectful
  • Be Safe

So anyway, to keep the learners focused on the fact that we were undertaking learning tasks, I did what I do best – I created a lesson in Class OneNote and distributed it to my Year 4-5 learners.  There’s nothing like clear Learning Intentions to remind students that we are learning, not just playing!

The first hurdle I had to overcome was – how do I teach 66 learners all at once?  Turns out that I didn’t have to – I had a significant number of Minecraft Experts on my hands!  I had all of the learners self-nominate their level of expertise, and then put themselves into groups of the following;

  • 1 Minecraft Expert
  • 1-2 Minecraft Middle-Roaders
  • 1-2 Minecraft Beginners.

One of my favourite aspects of this – is that the children that were Minecraft Experts, are not necessarily the usual leaders in my Village – giving a whole new level of respect to students who don’t always get to shine.

We strongly discourage (read don’t allow) learners to download anything off the internet.  So, in order for learners to have access to the Minecraft worlds that I want them to use, I created a shared folder in OneDrive.  Only one student from each group needs to download the world, and then the other members of that group can join up.  I went through the instructions step-by-step, but also included a screenshot and instructions in OneNote so that learners could remember how it’s done.

The groups of students then worked together to build expertise and get through all of the levels.  There was a huge buzz in the room, and seeing such diverse groupings of learners encouraging and supporting each other warmed my teacher heart.

All of the worlds that I’m using come straight off the Minecraft Education Edition website – a fantastic resource for Educators like me – willing, but not necessarily brilliant at using Minecraft.  All of the work is done for you!

What did I take away from this lesson?  That my learners continually surprise me and that they have more patience and persistence than I sometimes give them credit for.  I learned that I don’t have to be an expert at a technology in order to use it with students, I just have to set clear Learning Intentions, and the learners will do the rest.

Oh, and I also learned that my students love it when I bumble around with them – they really enjoy teaching me tips and tricks!  Go on – give it a go!

St Dominic’s Day

St Dominic’s Day

It really does take a Village to raise a child!

I’ve often mentioned in my blog posts in passing that I teach in a ‘Village’. This year, my Village consists of 66 learners and 3 Educators.  I’ve never really explained just what that actually means though.  My activity from St. Dominic’s Day this year gives me the perfect opportunity.

At Our Lady of Grace School, we teach in Villages. I teach in the Year 4/5 Village – currently the highest year level at our school.  There’s also a Village for Year 2/3 learners, and one for R/1 learners (R stands for Reception – a uniquely South Australian term for what other states call ‘prep’ or ‘foundation’.)

Working in a Village is a wonderful experience.  I get to work closely with two other Educators, and we can rely on each other when we’re having a bad day, off sick, to bounce ideas off, to have each other’s backs – basically to look out for each other.  Teaching can be an isolating job.  Between teaching and yard duties, I used to be able to go an entire day with barely a word to another adult.  There’s nothing better than being able to catch the eye of a colleague across the room and grin when something goes well!

The benefits aren’t just for the adults in the room though.  Our learners benefit too.  Educator off sick?  That’s ok – there’s still going to be two other Educators in the room that understand individuals, learning needs, social needs, friendship worries and family concerns. Haven’t really connected with one of the Educators yet?  That’s ok – there are two other different personalities in the room too.  Need a bit of extra support/ extension?  There are three adults to go around!

We maintain strong links between Villages too. Buddies, Junior Primary Fitness, Junior Primary Reading, Minecraft Club, Whole School Circle Time – all are Inter-Village events.

In honour of the Feast of St Dominic we had whole school rotations.  I teamed up with an Educator from the R/1 Village.  We began each rotation with a rendition of Bruno Mars’ “You Can Count on Me,” and then split the group in half.  Half added musical instruments to the song, and half came next door with me to add their hand to our school tree, before swapping.  I’m pretty pleased with the overall result of the tree – if I do say so myself.

It takes a Village to raise a child – and I wouldn’t have it any other way!


Microsoft Innovative Educator (MIE) Expert

Microsoft Innovative Educator (MIE) Expert


I’m just a little bit excited.  Ok, I’ll admit it – I may have danced around in front of the computer and fist bumped the air.  Did a little flossing – maybe!  I’m super thrilled to announce that I’ve been accepted into the Microsoft Innovative Educator Expert program for 2018-19!

Here’s the offical press release below.  What does this mean for me?  More growth, more development, more innovation, more community, more connection, more learning, more sharing, more facilitating, and (if possible) more passion for what I do. Let the new adventure begin!

Sarah Bau from Our Lady of Grace School Selected as Microsoft Innovative Educator (MIE) Expert

Recognised as global leader in using technology to transform education

August 1st – Adelaide – Our Lady of Grace – Glengowrie

Sarah Bau was announced today as a Microsoft Innovative Educator (MIE) Expert joining the more than 7,600 educators in the MIE Expert program worldwide. Each year, Microsoft selects innovative educators to share ideas, try new approaches and learn from each other as a global community dedicated to improving student outcomes through technology.

Mrs Bau, Year 4/5 Educator and Key ICT Teacher at Our Lady of Grace School, within the Catholic Education sector of South Australia, stated that she is,

“…excited and proud to have been named a Microsoft Innovative Educator Expert.  I can’t wait to begin learning with my new international community of highly skilled and enthusiastic educators.  I’m looking forward to sharing my knowledge and experience both within Our Lady of Grace School, and the wider community.”

As an MIE Expert, educators build their capacity for using technology in both the classroom and curriculum to improve student learning, advise Microsoft and educational institutions on how to integrate technology in pedagogically sound ways and be an advocate at conferences, events and trainings for how Microsoft technology can improve learning.

“Microsoft Innovative Educator Experts are inspiring examples of educators applying new ways of teaching and learning in their classrooms that motivate students and empower them to achieve more,” said Anthony Salcito, Vice President, Worldwide Education, Microsoft. “We celebrate and support the work they do every day!”

To learn more about the MIE Expert program, you can find out more here: http://aka.ms/mieexpert. If you are an educator and interested in joining the MIE program, you can begin by joining the Microsoft Educator Community, where you can learn and grow professionally, exchange ideas and learn from others, and make connections globally and earn recognition.

Ozobots, OneNote and Seesaw

Ozobots, OneNote and Seesaw

Recently, Our Lady of Grace was fortunate enough to borrow a set of 12 Ozobots from the Catholic Education SA Learning Technologies Team.  All Learners throughout the three Villages had the opportunity to use the Ozobots as part of their learning in the Digital Technologies curriculum. I was able to combine several of my favourite Digital Technologies tools – OneNote, Seesaw and robots (Ozobots in this case).


Learners in the 4/5 Village established an understanding of how the Ozobots worked, and then used the visual programming codes to create algorithms and debugged their algorithms to solve problems.  They used their knowledge of measurement to create a ‘race track’ measuring at least 100cm in length and incorporated a number of codes that they felt would help them to win a race against another Ozobot and learner.  This assessment was adapted from the Ozobot website – original lesson plan available here.

I wrote up the lesson for Learners in their OneNotes, and distributed the task out to them. I mashed up sections of the Ozobot lesson with note taking and reflection questions that linked to the Australian Curriculum.

For the labelled diagram component, students took a photo on Seesaw and then used the ‘Label’ tool to label all of the colour codes that they had used.

I’ve added the student OneNote page here. 

The Seesaw activity that we used for the labelling of their racetracks here.

Ideas for the Younger Years

R/1 Village

In the Early Years, the Digital Technology curriculum focuses on exploring and solving problems.  Learners experimented with using the Ozobots, making predictions and solving simple problems.  This included drawing lines for the Ozobot to follow, and when the Ozobot got confused, they went back and solved this problem, for example, by making the line thicker.  They made predictions based on experiences, such as, “The lights went red when the Ozobot went on the red line.  I think the lights will turn green when it goes on the green line.”

2/3 Village

After the initial exploration stage, learners in the 2/3 Village moved on to experimenting with colour codes.  They explored the best way to draw codes in order for the Ozobot to be able to follow and experimented with executing special moves (moonwalk, zigzag and tornado were favourites!)  Learners then made race tracks incorporating some of the special moves codes.  When codes were unsuccessful, learners developed and shared strategies for improving their track fluency.

Throughout the Villages, it was wonderful to hear the rich discussions around the Ozobots, including how they work, why the Ozobot wasn’t doing what they wanted it to, how to solve problems, negotiate access and work collaboratively.  Ozobots are now definitely on our wish-list for purchases for Digital Technologies at Our Lady of Grace!

Skip to toolbar