Creating Seesaw Activity Templates

Creating Seesaw Activity Templates

Get the Seesaw Activity featured in this post here.  Discover, use and adapt new Activities as I share them here.

I’ve been a Seesaw user for years.  It’s always been a great communication tool, but since the introduction of Seesaw Activities, my uses for Seesaw have exploded. It’s my favourite exit ticket.  All I have to do is to create an Activity, put the screen showing all of the student names on the interactive whiteboard, and refresh every couple of minutes.  Then, it’s just a matter of asking, “Johnny, where’s your post please?”  When they know that they don’t go out to recess until it is done – it happens!

Seesaw Activities haven’t really been used at my school until now.  Several of my colleagues are now using Activities that I’ve created, or that can be found in the Seesaw Library (one of my favourite additions to Seesaw ever!)  Every week, we have a whole-school Word of the Week.  This same word is introduced across Reception (That’s South Australian for ‘kinder’ or ‘prep’ or whatever you want to call the first year of school) to Year 12 (senior year). How we expose the students in our own class to the Word of the Week is up to us, and we modify it to suit the year level.

I’m going to tell you a secret here – I haven’t been very good at remembering to do the Word of the Week every week. I’m new to this school you see, and I’m new to working in the public sector after working in Catholic Education for 15 years. So, there’s been a lot of things to get used to, and I haven’t been able to do everything all at once.  But, it’s been almost two terms now, and I’m feeling more settled – so I felt that it was time for Word of the Week to make a new, improved reappearance.

I decided that introducing it in Homegroup would suit my Year 5/6s. They’re in the habit of coming in each morning and pulling out their computers to check emails, find new assigned Seesaw activities and do Mathletics.  Every Tuesday morning is now Word of the Week morning.  For the next term, my students will be investigating the relevant Word of the Week, and writing about it on this Seesaw Activity template – created by me!

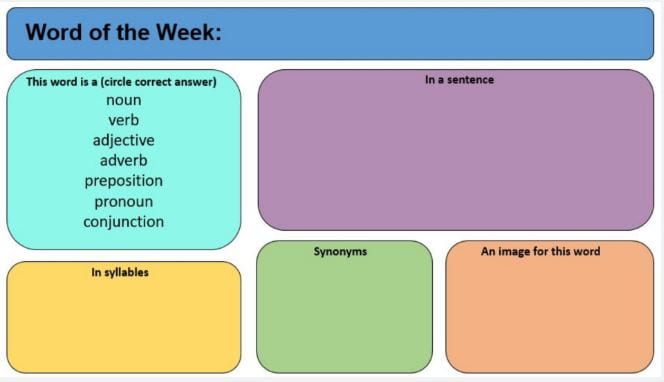
How did I create this template? How long did it take me to create this template?  Well, that’s pretty easy really.  I created it in PowerPoint, and it took me approximately five minutes.  PowerPoint is my favourite tool for creating items such as this, because I don’t have to worry about any pesky picture/ shape formatting that is problematic in something such as Word or Google Docs.  I inserted a rounded rectangle by using Insert – Shapes- Rounded Rectangle.  Insert – Text Box gives me the text (using the text box built into the shape puts the text into the middle of the rectangle – something I didn’t want in this case). All I did then was to copy and paste, rearrange the size a little, edit the text and change colours because it makes me smile.

To make it into Activity Template form, I took a screenshot using the Snipping Tool feature of my computer, and saved as a .jpg.

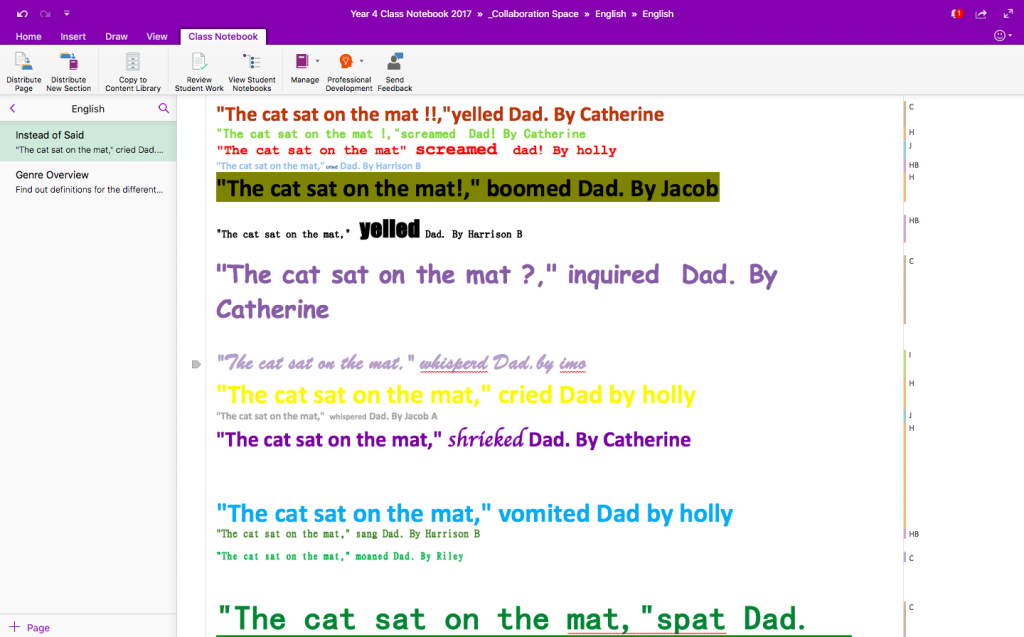
What I like about this particular Activity is that it uses the brand new upgraded features of Seesaw.  It is so awesome to have extra tools such as a highlighter to use – and the ability to insert photos has just about changed my students’ lives.  I kid you not – they were so excited!

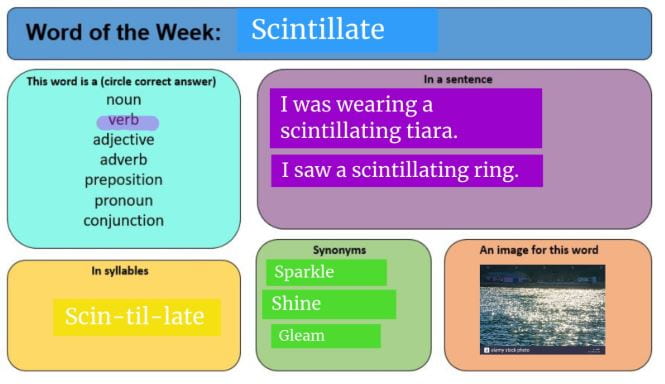
Is it just me – or did this student go above and beyond by making her text labels the same colours as my rounded rectangles?  Sometimes in life, it’s the little things!

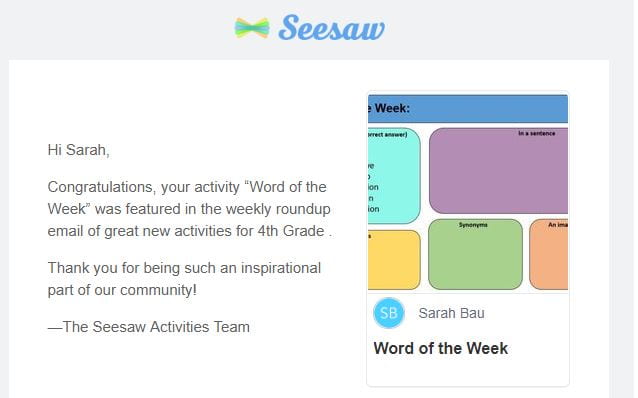
I’m just getting started with sharing Seesaw Activities with the Seesaw library. I was pretty chuffed when this activity was featured this week in the weekly Seesaw Activity email.  It’s nice to know that other teachers are benefitting from my work, just as I benefit from theirs. My motto in teaching – work smarter not harder!


Minecraft Lunch Club!

Minecraft Lunch Club!

This blog post is co-written with the lovely Heather Docherty – my main partner in crime (I mean, inspirational work colleague!) You can follow her on Twitter here: @hdocherty215  and while we’re at it, my Twitter handle here: @teacherbau


For the past few weeks, we have been volunteering our time to run a playtime Minecraft Club for 20 learners from Years 3, 4 and 5.  Learners were put into teams consisting of two Year 5s, one Year 4 and one Year 3.  

Over the course of the five weeks, the teams worked together to complete challenges in a world that was created based on the book Treasure Island by Robert Louis Stevenson.  It’s a brilliant world, you can find it on the Minecraft Education Edition website here.

The challenges that learners participated in were: 

  • Compass Challenge 
  • Scavenger Hunt 
  • Treasure Map 

In Compass Challenge, learners had to navigate around the Island and discover beacons placed at the eight main compass directions. To prove that they worked as a team, they had to take a team photo at each location, and send the photos to the two of us.  This was challenging because learners were tempted to fly off in all directions, and then had to negotiate where to go first, how to gather as a group for the photo, and how to keep track of which beacons had not yet been located. 

During Scavenger Hunt, learners worked in their same teams to find all of the items listed in a Minecraft Notebook. They were able to split up for this challenge, as time was limited. This challenge required constant communication and co-ordination as learners had to determine which items had been found, and ensure that photos of each finding were taken to record the location of the objects as evidence.  There was a great deal of confusion and then laughter as learners tried to complete the item, ‘tame a parrot’. 

Finally, learners were presented with the most complicated challenge yet – Treasure Map.  The Island they were working in is based on the original drawing from the book Treasure Island, with treasure hidden at the three locations marked with an ‘X’ on the original map. Learners had to work together to interpret the map on the Smartboard and compare it to the map on their computers within Minecraft. This required learners to use their understanding of map reading, including rotating, zooming and closely observing details.  Working within a limited timeframe meant that learners had to collaborate, with some taking on the role of map reader, team coordinator, treasure digger and photographer. 

Logistics

To enable the Minecraft Club to be a success, we created excitement amongst the students by informing them during the day that the Club would be on offer.  We then held a ‘find out more’ session during a lunch time.  We showed them the world, and explained how the Club would work.  We then took down the names of learners that were interested (some decided it wasn’t for them – they had been hoping for free play).  Happy to say, we had far too many interested learners!  So, we drew names then and there out of a hat, and created the first cohort. We sent home permission letters, outlining that it was a commitment, and it would be taking place during a playtime.  We also explained that continued participation hinged on learners following the school’s established ICT agreement.  We had 100% take-up, and our learners eagerly attended every session.

Outcome

We have been very proud of the collaboration between learners, with more experienced players providing guidance and support for newer participants. Seeing learners from a mix of year levels engaged together in problem solving, negotiation and fun has been well worth giving up some break time!  We had a new contingent of learners begin the Club this week, and we’ll be hunting through the Minecraft for Education World Library for another suitable world for later next term.

Conclusion

Give it a go!  It was fantastic that we had each other – that meant we could still take it in turns to duck out and have a snack etc.  So, while you could run a club by yourself, everything is better with friends, so we recommend that you rope in a colleague. You don’t have to have a lot of personal knowledge of or ability in Minecraft, just read the notes attached to the world.  An open mind and adventurous spirit will get you through!


Real Estate in Minecraft

Real Estate in Minecraft

Ok, so the first lesson we did made sure that all Learners had the same basic skills to navigate and create in Minecraft.

This lesson in Minecraft Education Edition was all about helping learners and their families realise the educational potential of Minecraft. The lesson was based in Starter Town – a lovely little world with some basic civics buildings and 30 numbered empty blocks of land – just waiting for eager builders!

Students negotiated amongst themselves on land selection, and were given two lessons to build, fit out and photograph their property.  (They won’t always need that long, but many of the students are still adjusting to the controls on Macbooks). The whole lesson was outlined in OneNote to ensure that learners stayed on track.  I’ve shared the overall lesson plan here (just look for the page called ‘Starter Town – Real Estate’.) . The Learning Intentions are shown in the image below.

Learners created such diverse houses – from castles to mansions, to mushroom cottages, to log cabins to glass houses.  Infinity pools, cinemas, fireplaces, libraries – all included.

This is where it got educational – learners had to create a sales pitch for their property, based on real estate adverts, then create and publish a tri-fold brochure.  We used the website Canva, which has a brilliant range of easy to use templates.  Just make sure that students don’t accidentally include any paid features – they can’t download their work if they do.. The completed products were very impressive, and I discovered creative flair that I hadn’t suspected lived within some of the students.  Below is one of my Learner’s brochures.  I love his use of colours, photos of unique features and range of adjectives used.

Brochures were printed double sided, and then trimmed, folded and sent home – with strict instructions to share immediately with parents. The verbal feedback that I received from parents was very positive – their children were coming home excited about their day, babbling about Minecraft, and excitedly thrusting brochures under their noses.  Students that were usually reluctant writers were incredibly keen to explain the features of their property, and to justify the hefty price tags attached!  Everyone could instantly see the educational value of Minecraft – in this instance, it was used as a prompt to inspire literacy.

A win-win-win situation if ever I saw one – happy learners, happy parents, happy me!  Next lesson will be looking at the Civics buildings that are in Starter Town.  I can’t wait!

Collaboration is Key

Collaboration is Key

The collaboration space in class OneNote is often under utilised because educators aren’t sure what to do with it, syncing problems when the internet is slow can result in confusion, and students fear their work will be copied. But, when used creatively, the ‘collaboration’ aspect of the Collaboration Space can be a very powerful tool.

Avoid competitive tasks in this space.

I prefer to use the Collaboration Space as a place where learners build resources together that they can all benefit from, where they share their ideas and support each other’s learning. Last year, we worked together and created a series of resources to support and extend each other in creative writing.

In ‘Instead of Said’ students were given five minutes to find as many different ways that they could to make the boring sentence, “The cat sat on the mat,” said Dad more interesting by using words other than ‘said’. They then copied and pasted their ideas into the Collaboration Space. We then had a bank of words to use instead of ‘said’ when including direct speech in narrative writing.

There are so many better words to use rather than, ‘said’!

Learners had so much fun with this activity, and found the said alternative list so useful that I expanded this idea to other aspects of narrative writing.

Emotional Inferencing

We were looking at inference, and ways of suggesting how a character is feeling without actually naming that emotion. So, students selected an emotion each to write about, and we then copied their work into an emotion bank to benefit all students in narrative writing. This was lots of fun, and useful to boot!

You can see down the left all of the different emotions that students selected – such a great resource for writing projects!

I’ve added the ‘Emotion Inferences’ blank page to my shared Bau Teacher Adventures OneNote.  Find the link here, and please feel free to adapt and use!

Spectacular Settings

This year, I’m also going to include a ‘settings selection’ section in the Collaboration Space.  I’m planning on having students gather a variety of pictures of different scenes, seasons etc, and brainstorm some interesting descriptive words to go with them.

Lots of lists

We also use the Collaboration Space as a central location for groups of students (or even the whole Village).  These lists have included;

  • Class brainstorm on what to pack for school camp
  • Sphero project ideas
  • Fitness/ Brain break bank
Ideas for Sphero projects – it was a long list, and there was a great deal of excitement!
This was from before I discovered Forms! Learners initialled their top preferences for lollies for movie night on school camp.

Peer Editing/ Support/ Assessment

Learners complete a rough draft of an essay or project in their personal Notebook section, and then copy and paste the page into the Collaboration Space, where another student provides constructive feedback/ assists with editing/ does a peer assessment.

The original learner then copies the page back into their personal Notebook, and applies any changes/ constructive criticism that they agree with.

Preventing Syncing Errors

Sync errors are the most frustrating aspect of the Collaboration Space, and can turn excitement to dismay in a matter of moments. I have several methods of avoiding this problem, depending on what type of task we are doing.

  • Inserting tables and assigning each student a separate line.
  • Assigning each group of students a separate page within a Section, so all students can easily find each group’s work, but only a few people are contributing to a page at a time.
Students worked on this in groups of 4. Because the table was colour coded, learners were encouraged to talk to each other about which section they were currently added to in order to avoid syncing errors.
  • Learners do the work in their individual Section, and then copy and paste the page to the Collaboration Space, ensuring that they have their original in a safe place.

So, collaborate, don’t compete, and then sit back and listen to your learners’ conversations as they interact, support and encourage each other!

Getting My Art On

Getting My Art On

There are many things that I can do well, and a few that I even excel at.  But, art isn’t one of them. I enjoy art. I like looking at art in galleries, and I even have a few pieces that we’ve bought over the years that bring me joy whenever I see them.  But to create art?  That’s a whole different ball game!

Of course, I do teach art, since I’m a generalist primary teacher.  I really enjoy teaching art.  I’ve been blessed to travel to some very famous art galleries across Europe, and I’m enthusiastic about artists such as Picasso, Da Vinci, Monet, Van Gogh, Dali and Warhol.

But, this time, I was way out of my comfort zone.

You see, it was Spring Fair time at Our Lady of Grace School, and all of the Villages had been asked to create a piece of artwork to be sold at the Fair.  We were asked to create an individual artwork per student, and a collaborative piece per year level.  On canvas.  Yes, that’s right, ON CANVAS!  I have never, never, painted on canvas, or taught anyone to paint on canvas.  Help!  I devoted an entire Saturday to searching the internet.  Thank goodness for YouTube, and thank goodness for my new art hero, The Art Sherpa.  I was instantly mesmerised by her hair and hats, and her simple, but beautiful paintings.  This, I could do!  This, a classroom full of 9-11 year olds could do too.  Since we have several sets of siblings in the Village, we had the Year 4s do the dandelions, and the Year 5s do the Lilacs (I chose flowers since it was the SPRING Fair.  You see what I did there?)


It was harder to find something collaborative.  I got some great ideas for the future, but since I was restricted to a canvas for this year, I had to make it work.  Eventually, I came across a couple of artworks by the same artist that looked like it had potential.  (Seriously, how did teachers survive before Pinterest and YouTube?)  Here’s the original…

https://www.etsy.com/au/listing/76587519/large-wall-art-original-tree-painting

And here are our versions.  I’m happy to say, that they both sold at auction on the day!

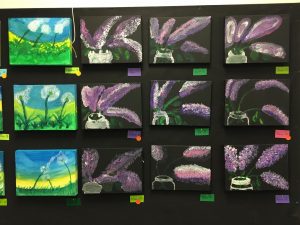
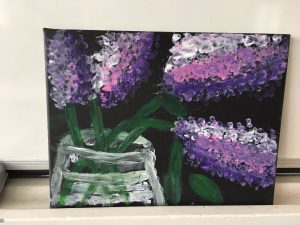
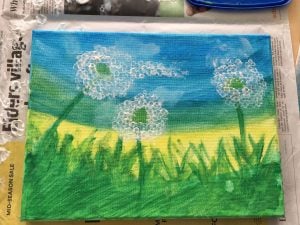
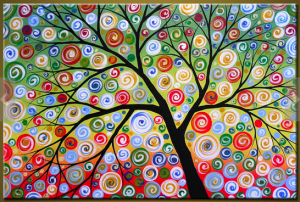
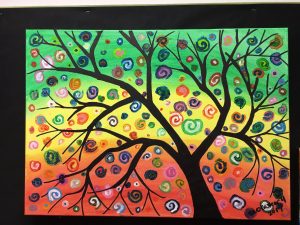
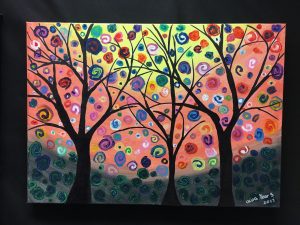
  Of course, it felt as though we did nothing but art in the lead up to the Spring Fair, much to the delight of the learners.  But, I got the last laugh, as I managed to get an art assessment, reflection and procedure writing out of them!  Since the collaborative pieces didn’t come with instructions – we were simply going off a picture, we had lots of great discussion about how to build the artwork up in layers (we learned all about layers by doing the individual artwork).  Here’s a sample of one of the Year 4’s efforts. (Just in case you want to have a go at painting it in the future!)

  1. Turn your canvas landscape and get out all of your paint tools and your canvas.
  2.  Paint the bottom third of your canvas red.
  3. Paint a third of the canvas yellow above the red you just painted and make sure you blend the two colours together to get an orange colour.
  4. Now paint the last third of your canvas green and also blend it with the yellow like you did before.
  5. Now let the coat of paint you just painted dry for 1-2 hours.
  6. Now get a black permanent marker and outline a tree that takes up almost the whole canvas. (Just draw on the thin branches on to your tree.)
  7. Now get out your black paint and paint in-between the black outline of the tree to make a fully black tree.
  8. Now you’ll need to let your tree dry for 1-2 hours before you can continue.
  9. Once your painting has dried you can paint on a two coloured swirl that looks like the swirls in the image above, also you can do this in any colour of your choice. (Keep doing this until nearly your whole canvas is full.)

Happy painting!

Skip to toolbar