Minecraft Mission to Mars

Minecraft Mission to Mars


I’m so excited!  I literally bounced into one of my co-teacher’s rooms after school last week, waving around my computer and shouting, “Look at this!  Sooo cool!  The kids are going to FREAK!” I’ve only been at this school for two terms, but my new School Squad know me well enough to smile indulgently when I show this much enthusiasm.

I’d been looking for a fun, challenging and engaging collaborative Minecraft challenge that would stretch my students and be a good feature for our STEM week event.  I found it!  It’s available on the Minecraft Education Edition website and is called Mission to Mars, created by the talented Chris Fuge (Twitter,  website) (I hope you create more worlds and lessons soon!)  It looked awesome.  Students tour a NASA facility, learning how to survive and thrive on Mars, with lots of NPC scientists providing external links to more kid-friendly research.  Then, and this is where it gets AWESOME, you fill a single, solitary chest with just 27 items before blasting off in a rocket ship to Mars.  There, you have to build a colony, survive radiation, accidents and sickness, find water, create a facility and grow enough food to survive.
My School Squad are fantastic, but they are yet to become Minecraft enthusiasts (I’m already straining their brains with Seesaw!)  So, there was only one thing to do. I had to call in the big guns to help me to experiment with this world – my two personal children (as opposed to my many school children!)

So began a wonderful afternoon of research, debating, arguing, crossing out and filling in of lists before we launched off to Mars and built our colony.  My 12 year old son is the true building whizz, with my daughter having a flair for organisation, and I’m pretty good at planting trees and harvesting wheat. (I’m far better at teaching with Minecraft than I am at using Minecraft, but I get by).  We were all pretty happy with the results, and I was able to get a lot of tips to pass on to my less experienced students.

Here are our top tips for successful Mars colonisation:

  • Teamwork – definitely have groups of at least 3 students, stretching to 5 quite comfortably.
  • Research which tree types grow best in an enclosed area, and how far apart to plant them.
  • Crops need water to grow – have a couple of plans for how to get water on Mars.
  • Have students assign roles – this is more efficient than everyone going off and doing their own thing.
  • Eat regularly – all of that building and exploring will make your hunger grow quickly.

Here are a few screenshots of our colony.
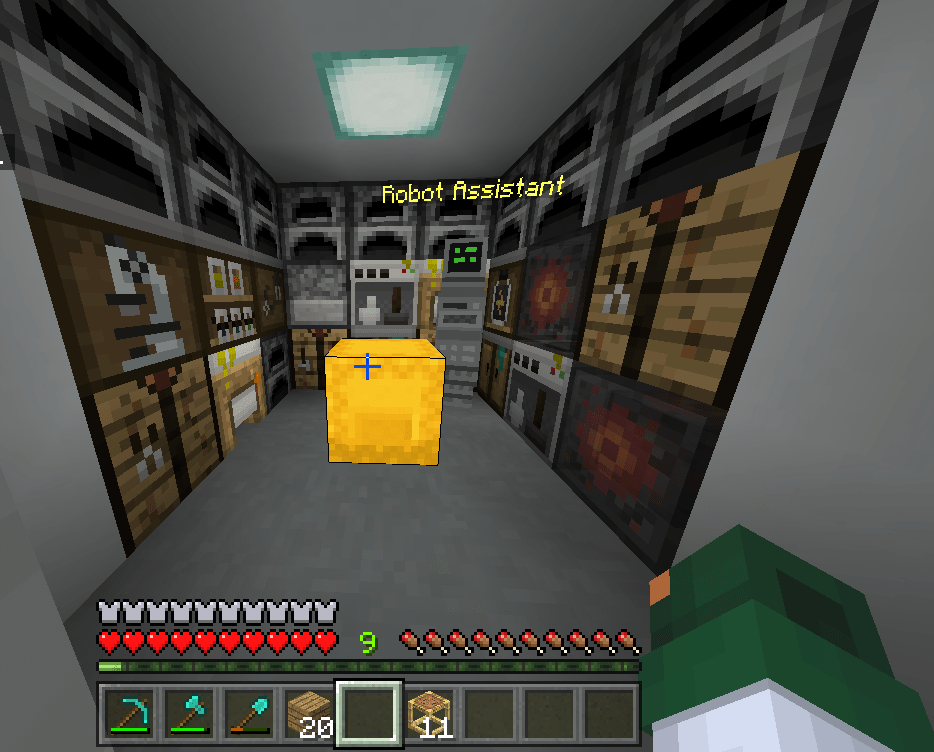
This module arrives with you on Mars – we added multiple furnaces to speed up glass production.
Crops need water – how will you ensure you have enough?
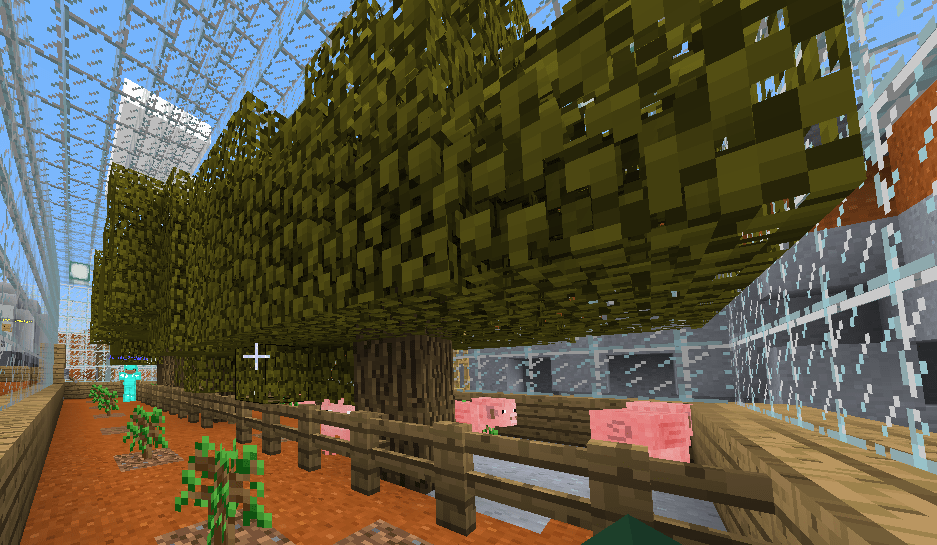
We put animals and trees into the same greenhouse. Our trees are planted too close together – some didn’t grow.
Our partially built colony. Mars is desolate and lacking in many resources. Pack carefully!

Our conclusion?  This activity is as awesome as it looked on the website!  Seriously, I can’t wait until I get back from the July holidays (two weeks in winter in Australia) and get stuck into my Minecraft sessions.  I’ll have six weeks of 110 minutes with my group of 25 students, which should be just about perfect.

I’ve adapted the already fantastic student worksheet provided (the original was designed for printing – I’ve adapted it for OneNote use). You can find the OneNote version here along with my other resources created to go with previous blog posts.  Full credit to Chris Fuge  – I’ve just added in my trademark tables and a place to insert photos.  I’ll also have students document the entire journey by using the Minecraft Portfolio and Camera objects (meaning my students get to select only 25 objects!)

Want to know what our final Mission to Mars pack list was?  Sorry – not telling!  You’ll have to download the world from the Minecraft Education and try it out yourself.

Creating Seesaw Activity Templates

Creating Seesaw Activity Templates

Get the Seesaw Activity featured in this post here.  Discover, use and adapt new Activities as I share them here.

I’ve been a Seesaw user for years.  It’s always been a great communication tool, but since the introduction of Seesaw Activities, my uses for Seesaw have exploded. It’s my favourite exit ticket.  All I have to do is to create an Activity, put the screen showing all of the student names on the interactive whiteboard, and refresh every couple of minutes.  Then, it’s just a matter of asking, “Johnny, where’s your post please?”  When they know that they don’t go out to recess until it is done – it happens!

Seesaw Activities haven’t really been used at my school until now.  Several of my colleagues are now using Activities that I’ve created, or that can be found in the Seesaw Library (one of my favourite additions to Seesaw ever!)  Every week, we have a whole-school Word of the Week.  This same word is introduced across Reception (That’s South Australian for ‘kinder’ or ‘prep’ or whatever you want to call the first year of school) to Year 12 (senior year). How we expose the students in our own class to the Word of the Week is up to us, and we modify it to suit the year level.

I’m going to tell you a secret here – I haven’t been very good at remembering to do the Word of the Week every week. I’m new to this school you see, and I’m new to working in the public sector after working in Catholic Education for 15 years. So, there’s been a lot of things to get used to, and I haven’t been able to do everything all at once.  But, it’s been almost two terms now, and I’m feeling more settled – so I felt that it was time for Word of the Week to make a new, improved reappearance.

I decided that introducing it in Homegroup would suit my Year 5/6s. They’re in the habit of coming in each morning and pulling out their computers to check emails, find new assigned Seesaw activities and do Mathletics.  Every Tuesday morning is now Word of the Week morning.  For the next term, my students will be investigating the relevant Word of the Week, and writing about it on this Seesaw Activity template – created by me!

How did I create this template? How long did it take me to create this template?  Well, that’s pretty easy really.  I created it in PowerPoint, and it took me approximately five minutes.  PowerPoint is my favourite tool for creating items such as this, because I don’t have to worry about any pesky picture/ shape formatting that is problematic in something such as Word or Google Docs.  I inserted a rounded rectangle by using Insert – Shapes- Rounded Rectangle.  Insert – Text Box gives me the text (using the text box built into the shape puts the text into the middle of the rectangle – something I didn’t want in this case). All I did then was to copy and paste, rearrange the size a little, edit the text and change colours because it makes me smile.

To make it into Activity Template form, I took a screenshot using the Snipping Tool feature of my computer, and saved as a .jpg.

What I like about this particular Activity is that it uses the brand new upgraded features of Seesaw.  It is so awesome to have extra tools such as a highlighter to use – and the ability to insert photos has just about changed my students’ lives.  I kid you not – they were so excited!

Is it just me – or did this student go above and beyond by making her text labels the same colours as my rounded rectangles?  Sometimes in life, it’s the little things!

I’m just getting started with sharing Seesaw Activities with the Seesaw library. I was pretty chuffed when this activity was featured this week in the weekly Seesaw Activity email.  It’s nice to know that other teachers are benefitting from my work, just as I benefit from theirs. My motto in teaching – work smarter not harder!


Skip to toolbar